03 November, 2005

PENCIL TECHNIQUES FOR FUR AND ETC.

As I start here to show you some of my techniques, I want to say that I am first and foremost a graphic artist and not a fine artist. Which translates to, that I do a lot of my work to earn a living. To a graphic artist, time is money and I will use short cuts. Not to say that my clients do not get a first class job, but they get more from me in a dollar to time ratio far beyond what I am being compensated. A lot of my pencil pieces are for The Pennsylvania Game Commission's hunting and outdoors magazine. All the assignments are predetermined on what the rate is for illustrating a story or doing a magazine cover. I try not to actually figure what I am being paid per hour, because I would probably not be inspired to do another great job for them. The art for the magazine is something that I enjoy immensely. For the work that I do in my "day time" job as a Harley-Davidson artist pays the bills. Pencil illustrating is more of a hobby than actual work to me so I can "work" for less. The bonus hours I spent comes in the form of pay when someone from Pennsylvania calls just to say how much he or she liked the artwork. It is so rewarding, especially when you are now residing in Florida and not where you lived and spent most of your life. Pennsylvania will always be "home". So with all this said, let's begin.

Reply

11 Comments

WESTERN ARTWORK By Denny Karchner 03 Nov 2005

As a graphic artist I always start with best reference I can possibly get my hands on. I have never been at my best drawing from pure memory or illustrating something that does not exist. A lot of artists are quite capable of drawing this way, but I prefer not to go this route. I insist on complete accuracy. I believe that the more detail you can see, the more detail you can draw.

I have various clipart-type packages that I use. I have a CorelDRAW edition. I have an Art Explosion 600,000 Image edition. I have The Big Box of Art 615,000 Images. Lastly I have a Dynamic Graphics Clipart edition in my reference library. Most all of these have thousands of photo images that are royalty-free and can be used for your artwork. Animal, cars, people, outdoor scenes, you name it, it's there. Most of these editions are available at places where computer software is available. My opinion is if I use just one or two photos as reference of each set of clipart, then it has more than paid for it. Mine has been paid for over and over.

First I chose the photo or photos that I will be using for reference. If I am going to use more than one photo to draw from, as in a photo of an animal and a different background or another element, I will put them in PhotoShop. I will rough crop them and put each piece on a different layer. I will position the pieces roughly how I want them to look in my final pencil drawing. I then size the reference to the exact size that I want my final pencil drawing. I usually convert all my photos to grayscale because I almost always do my pencil drawings in black and white. You tend to see your details a lot better this way when you are trying to recreate your pencil from the photo you are drawing from are in black and white. If you are drawing with colored pencils, by all means keep your photo reference in color.

Once I have the photo reference the way I want it and sized, I will send it to a printer and output it. I will print two copies. Depending on the reference, I will output one that is larger than the one that is going to be the size of the final drawing. I make a larger copy so I have a "close up" to see detail better. I then take the copy that is the same size as my pencil final and flip it over and lay it on something real smooth. Like a glass, or smooth illustration board back. I will take a stick of graphite or a pencil in the 4B range and I will cover the backside of the copy really well. Almost to the point of the back is covered in a solid black graphite area.

WESTERN ARTWORK By Denny Karchner 03 Nov 2005

I have an illustration board ready to go to use for my final pencil drawing. I usually prefer a medium weight illustration board with a "hot press surface". The hot press means that is a real smooth surface. A "Cold press surface" means that it has a somewhat rougher surface. I feel that I can get better detail when the surface is smoother. The "cold press" will give you a nice texture in your illustration if that is what you are looking for. It is just a matter of personal preference. Try them both, they are not that expensive. One other thing while I am on the subject of illustration board, I have done it and I know you have done it. You will start a drawing and you think that it is going to be a "quickie study" so you work on a page in your sketch tablet or on a piece of paper. You finally start to realize "this piece of quickie artwork" is turning into a frameable piece. "I sure wish I had used something more substantial to do this drawing". I always use illustration board now just for that fact. Framing up a piece of lightweight paper sure does not hold like board. It's really not that expensive. A good tip, go for the illustration board from the start.

Back to the pencil art. I take the printer copy with the pencil graphite on the back and I lay it with the pencil graphite down and the photo reference side up on the illustration board. Position it right where you want it on the board. If you are not sure it is straight, use a ruler and measure it. Take two pieces of tape and tape it at the top of the page.

I then take a sharp pencil and I start to draw all of my main outlines of my elements in the photo reference. Try to follow the detail line as close as you possibly can. The closer they are the more like the original reference they will be in the end result. By this method, you will transfer a real accurate outline of your reference to the board below. OK, OK, I can hear some of you say "this is cheating". Refer to the very first statement I made when I started this lesson. I am a "graphic artist". A graphic artist is someone is produces art to make a living. "Time is money". What I have just shown you here will save you a ton of time and I guarantee, will give you a more detailed, accurate final pencil drawing the trying to "eyeball" it. Besides, "anyone" can trace an outline, but let's see if "anyone" can take the photo reference after you transferred the outlines to the board, remove it and start to "fill in" the outlines. This is where the "real art" in the "real artist" comes out. Not everyone can do this.

WESTERN ARTWORK By Denny Karchner 03 Nov 2005

Go a head and transfer as many lines and details that you feel comfortable with to start the final piece. The reason that I said to tape the printer copy across the top is so you can lift it up to see how your transfer outlines are going down or if any are missing any. When you are done transferring what you want, remove the copy carefully. Be careful not to pull up the surface of the board with the tape. I use a 3/4" drafting style masking tape. This kind is not as sticky as some other masking tape.

This will be a good stopping point for PART I. I have told the artist "Spirit Wolf" from the Tutorial question "Does anyone have any tips on FUR drawing?" that I would address my techniques on just that subject. Part II will be the final steps in completion of the wolf rendering as promised. Please stay tuned.

-Dennis Karchner-Buffalo Graphics

sheila stanley-powell 06 May 2008

hi denny, having just gone through your tutorial i had to laugh when reading the comment on tracing the outline being cheating. from a fellow "graphic" artist i can really relate to this. when i explain my technique for scratchboard to people i can just see the cog wheels going- what? you trace the outline and use THAT as your starting point? but, anyone can do that and isn't that cheati...... and so on and so on. i u pretty much the same methods as you, right up to when you start doing your fill in. from there, i 'fill in' with a block of india ink then using my tracing, when the ink is dry, i trace the main details ie: eyes, muzzle,breaks in fur or feather patterns etc. and then the 'real work' begins. it's what happens next that makes you or breaks you as an artist. not to sound arrogant('cause i'm the farthest you can get from that when it comes to acknowledging my own abilities)but i defy most people to do the "fill in" with the detail and accuracy that i do and THAT'S what makes me (us) a graphic artist and not just someone doing 'nice pictures'.

Fiona Robinson 21 Jun 2008

Hi Denny,

very interesting post. I too sometimes do the technique you use but only some areas. I am not good at getting things looking in proportion so sometimes use a graph method as well. I agree, people call that cheating, but try doing all the shading and details to make it look alive is another skill - or it would look like a colour in wouldn't it LOL!

Thank you so much

Fiona

chris newbrook 22 Jun 2008

Excellent demonstration Denny, and I admire all the time and input you put into describing aspects of your artisitc profession.

I would describe myself as a commercial artist, aiming to sell my work to a wider mainstream audience, not creating something exclusive which would only attract a narrow group of buyers.

Time saving techniques are important for a professional, and i agree that this doesnt mean that the standard and quality of work suffers.

I know that many painters use projecters to lay down initial drawings on canvas, and some even copy in minute detail from photographs, which in itself is a great skill and requires ability and artistic talent.

My technique is still fairly traditional in that when i work from photographs or drawings, i square up the source images using a pen. then scale up this grid onto a large canvas using large rulers and chalk, then begin the painting after this initial sketchy stage. I prefer this to tracing images onto a canvas, as it still allows the element of chance, which develops into a more intuitive composition rather than literally from a photograph.

I'm definitely interested if finding new processes to get images onto canvas, and the means will always justify the ends...in a professional sense.

darrell parrott 18 Jul 2008

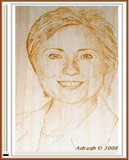
Denny, have you ever used a projecter? For commosioned work I use it not only for the speed and persision but I find it very helpful as a tool for fine tuning the composition. By seeing the image already on the canvas, I can see if it works or needs adjusting. On a portrait I locate the main shape of the head and features, but I carfuly mark the positions of the corners of the eyes, nostrals and mouth. With these landmarks and the cartoon, I can paint quickly knowing that the drawing is right. The cartoon is just the starting point on a portrait, the rest is were art happens.This piece is 11 in. x 14 in. and took 22 hours of work. I always keep tract of the time on each peice.

WESTERN ARTWORK By Denny Karchner 13 Jan 2009

Thanks for the post everyone.

Darrell, I have not used a projector for doing my graphites or paintings. I have used one for during murals. If I had one now, I would probably give it a try. Great looking piece, by the way!

Thanks again to everyone.--Denny ;{

LouAnn Knight 17 Feb 2009

Big thanks, Denny, I just read "part ONE" of your tutorial. My instructor/fellow art club member in a small town in OH also started me out with the 'tracing' using carbon paper to outline the head, eyes, ears and mouth every so slightly, so as not to show thru the CP. I also had the feeling of 'cheating', since all my animals had been done free-handed and multiple human drawings had gone into the garbage can. I ignored the feeling of cheating and followed her instructions day by day for 3 lessons. Unfortunately, I moved away and my lessons ended. Thus I looked here and am glad to find you. Going to read the rest now.. but couldn't help but smile inwardly at your reassurance! THANKS... LouAnn Knight..

Natascha Mattens 30 Apr 2009

I think this is okay for starters. But I think it's better to learn to see for drawing. Only then you learn how something is constructed.

Gail Caduff-Nash 07 Oct 2010

hi, Denny, i stopped by your AW page to look at your work - been a fan for awhile now - and found this tutorial. i, too, learned some graphic arts - and this technique. i rarely use it for my own stuff. but for those who haven't tried it, and think it's easy - it can be just as mind-numbing as just drawing something from scratch - but the biggest point i'd like to make is that BECAUSE you can't use some reference photo for all your renditions, wanting different angles of the same subject, you end up having to draw it anyway most of the time. but doing this graphic technique actually helps your skills when it's time to sketch out your own picture. don't you think so, Denny? it's like your hand has a memory of doing the picture and it's easier to do a second one even from a different perspective. so there is a lot of validity to it.

Reply