18 April, 2023
- Mark Graham
Latest Comment...
Good evening. I would really like to offer a instruction courses in Art history, Appreciation and/or Art education/theory. As I mentioned in my bio I do have the degrees to teach. Thank you.
20 December, 2016
- ArtWanted.com Staff
- 20 Dec 2016
- 2,200 Views
- 12 Comments
Original Post: New Feature: ArtWanted Project Images!
We have just gone live with a new feature on our website for all members… ArtWanted Project Images!
Tell the story behind your artwork (or photographs) with additional related project images. These supporting images can be attached to any new or existing image in your portfolio and are displayed under your main image.
Project images can be used for a variety of purposes. Here are just a few ideas…
Project Image Ideas
- Artwork In Progress – As you create your artwork, take screen shots or photographs throughout the process. Upload these timeline images as project images to add additional depth to your artwork.
Sketches – Most artists like to create a sketch or rough mockup before they start their final piece. These early ideas are great to share with your audience, so they can see the process you go through to complete your artwork.
Related Photographs – As a photographer, you will normally take a series of images during a photo shoot. With the new Project feature, you can share some of the related photographs that were taken during your photo shoot to show different positions, poses or view points.
3D Modeling – As a 3D artist, you may want to share your early wire frames or 3D models before the final render of your artwork. This helps people understand the process you go through when creating 3D art.
Artwork Fine Details - If your artwork has a lot of details to it, show off those details with the new Project feature. Simply create cropped images of the detailed areas you want to showcase, and upload those files as supporting project images.
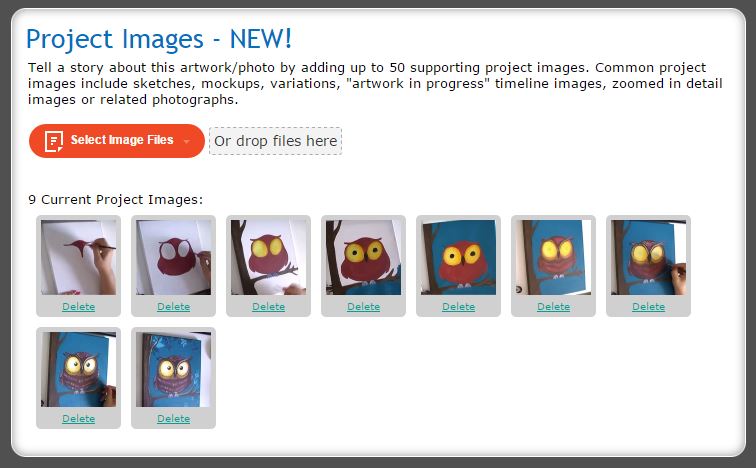
How to Upload Project Files:
Adding project files to new or existing artwork is very easy.
- Step 1) Simply upload your main image like any other image in your portfolio (if your image is not already in your portfolio)
Step 2) Next, go to your MANAGE PORTFOLIO page in your MEMBERS AREA and click the pencil icon to EDIT the IMAGE you want to enhance with project images.
Step 3) Locate the new PROJECT IMAGES section at the bottom of the edit image page.
Step 4) Upload your project images by clicking the “Select Image Files” button, or simply dragging your images in the “or drop files here” box.
Step 5) After all your images are uploaded, view your artwork and you will see the supporting project files under your main image.
We look forwarding to seeing what you do with the new ArtWanted Project feature. In fact, after you have uploaded your project files, share the link on this message board post for all to see. Enjoy!